Introduction
Faire le mauvais choix LCD La taille peut obliger à repenser entièrement la conception mécanique. Choisir une mauvaise résolution rend le texte flou, les icônes pixélisées et donne à votre produit un aspect peu soigné. Tous les ingénieurs en matériel informatique et chefs de produit ont déjà été confrontés à ce dilemme.
Ce guide de 4 000 mots vous propose un cadre décisionnel structuré. Vous y apprendrez :
- Comment on mesure la taille d'un écran (et pourquoi se baser uniquement sur la diagonale est trompeur).
- La véritable signification de la résolution et du PPI (pixels par pouce).
- Comment trouver le juste équilibre entre taille, résolution, coût et performances.
- Combinaisons taille-résolution recommandées pour les applications courantes.
- Comment calculer le PPI minimum requis pour une distance de visionnage donnée.
- Les erreurs courantes et comment les éviter.
Un Feuille de calcul pour le choix de la taille et de la résolution d'un écran LCD (Excel) est inclus : indiquez votre distance de visionnage et le PPI souhaité, et il vous proposera le produit le mieux adapté parmi notre gamme standard.
Pour mieux comprendre comment les interfaces influencent les choix de résolution, consultez notre “Guide complet des interfaces TFT-LCD”.
Partie 1 – Concepts de base : que signifient réellement les termes “ taille ” et “ résolution ” ?
1.1 Taille : la vérité sur les pouces en diagonale
La “ taille ” d'un écran LCD correspond à la longueur de sa diagonale, mesurée en pouces (1 pouce = 25,4 mm). Il s'agit d'une norme industrielle, mais elle peut prêter à confusion.
Pourquoi la diagonale seule ne suffit pas
Deux écrans de même diagonale peuvent présenter des caractéristiques très différentes formats d'image (4:3, 16:9, 16:10, 5:4). Un écran de 7 pouces au format 16:9 est beaucoup plus large et moins haut qu'un écran de 7 pouces au format 4:3. Vérifiez toujours le plan d'assemblage.
Comment calculer la diagonale
Si vous connaissez la largeur (W) et la hauteur (H) de la zone active en mm :
\[
\text{Dimensions (en pouces)} = \frac{\sqrt{L^2 + H^2}}{25,4}
\]
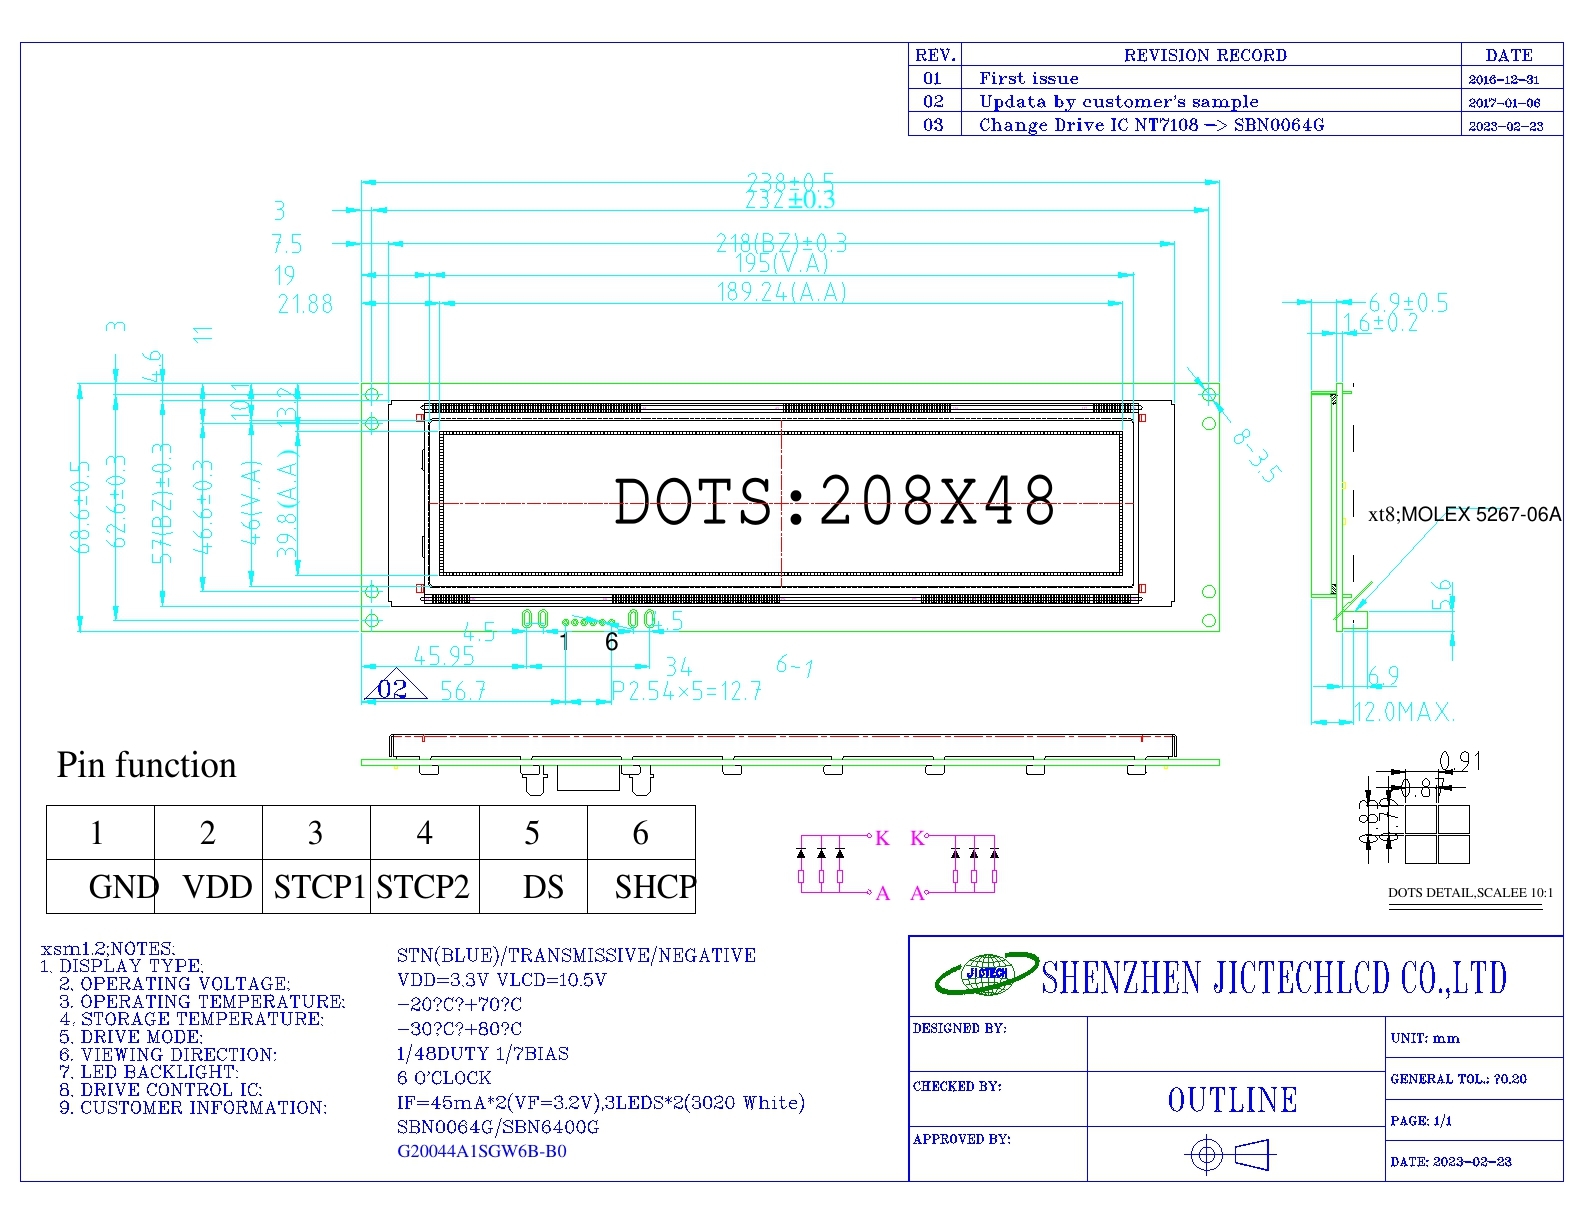
[Lien interne : Consultez notre bibliothèque de plans techniques des écrans LCD – chaque page produit comprend un plan coté.]
1.2 Résolution : la matrice de pixels
La résolution correspond au nombre de pixels horizontaux multiplié par le nombre de pixels verticaux, par exemple 800×480.
Niveaux de résolution courants
| Résolution | Nom | Gamme de tailles habituelle | Utilisation courante |
|---|---|---|---|
| 128×64 | – | 2,4 cm – 6 cm | Interface utilisateur monochrome et simple |
| 320 × 240 | QVGA | 2,4 pouces – 3,5 pouces | Appareils monochromes à bas prix |
| 480 × 272 | WQVGA | 3,5 à 5 pouces | Appareils portatifs, appareils électroménagers |
| 800×480 | WVGA | 12,7 cm – 17,8 cm | IHM industrielles, TPV |
| 1024×600 | WSVGA | 7 à 10,1 pouces | Interface utilisateur de type tablette, destinée au secteur industriel |
| 1280×800 | WXGA | 20,3 cm – 31,2 cm | Automobile, interfaces homme-machine haut de gamme |
| 1920×1080 | Full HD (FHD) | 10,1 pouces – 21,5 pouces | Écrans médicaux, jeux vidéo |
1.3 PPI (pixels par pouce) – Le véritable indicateur de netteté
Le PPI indique la densité des pixels. C'est la seule mesure réelle de la netteté.
Formule
\[
\text{PPI} = \frac{\sqrt{\text{pixels horizontaux}^2 + \text{pixels verticaux}^2}}{\text{diagonale en pouces}}
\]
Exemple
Un écran de 7 pouces avec une résolution de 800 × 480 :
√(800² + 480²) = √(640 000 + 230 400) = √870 400 ≈ 933
933 / 7 ≈ 133 PPI
PPI recommandé par application
| Application | Distance de visionnage habituelle | PPI recommandé |
|---|---|---|
| IHM industrielle | 50 à 100 cm | 80 – 120 |
| Appareils médicaux portables | 30 à 40 cm | 150 – 250 |
| Smartphone | 20 à 30 cm | 300+ |
| Téléviseur / écran | > 100 cm | 60 – 80 |
| Automobile | 60 à 80 cm | 120 – 180 |
Avertissement
Un PPI plus élevé n'est pas toujours synonyme de meilleure qualité. Il augmente :
- Exigences en matière de bande passante (nécessité d'interfaces plus rapides telles que LVDS ou MIPI).
- Puissance de traitement de l'hôte (mémoire tampon d'image plus grande, charge plus importante pour le GPU).
- Puissance du rétroéclairage (une densité de pixels plus élevée réduit le rapport d'ouverture).
- Coût (circuits intégrés plus chers, rendement de fabrication plus faible).
Partie 2 – Compromis entre taille et résolution
2.1 Que se passe-t-il lorsque l'on augmente la résolution pour une taille fixe ?
Avantages
- Une image plus nette.
- Plus de contenu à l'écran (par exemple, davantage de lignes dans un tableau de données).
Coûts
- Une bande passante d'interface plus élevée → peut nécessiter le passage du format RVB au format LVDS ou MIPI.
- Une mémoire tampon d'image plus grande → peut nécessiter une mémoire RAM externe ou un microcontrôleur plus puissant.
- Un rapport d'ouverture réduit → une transmission lumineuse moindre → nécessite un rétroéclairage plus puissant (et plus chaud).
- Une hausse du coût des circuits intégrés et une baisse du rendement → augmentation du prix des modules de 20 à 50 % lors du passage d'une résolution WVGA à une résolution WXGA pour une taille identique.
2.2 Que se passe-t-il lorsque l'on agrandit une image à une résolution fixe ?
Avantages
- Une zone active plus grande → des zones tactiles plus faciles à atteindre, une meilleure lisibilité pour les utilisateurs plus âgés.
- L'interface utilisateur du logiciel fonctionne sans modification.
Coûts
- Baisse de l'IPP → les pixels deviennent visibles (“ effet de grille ”).
- À résolution égale, l'image apparaît pixélisée et irrégulière sur un écran plus grand.
- Il devient plus difficile d'obtenir une uniformité du rétroéclairage (il faut davantage de LED, ce qui augmente le risque de points chauds).
2.3 Les combinaisons idéales : taille et résolution en fonction de l'application
| Application | Gamme de tailles | Résolution recommandée | PPI (environ) | Interface type | Distance d'observation |
|---|---|---|---|---|---|
| Montre connectée | 3,5 cm – 4,5 cm | 240 × 240 ou 390 × 390 | 250 – 300 | MIPI / SPI | 30 cm |
| Appareils médicaux portables | 3,5 à 5 pouces | 480 × 320 ou 800 × 480 | 150 – 200 | MCU / RVB | 40 cm |
| IHM industrielle | 7 à 10,1 pouces | 800 × 480 ou 1024 × 600 | 100 – 120 | RGB / LVDS | 60 cm |
| Infotainment automobile | 20,3 cm – 31,2 cm | 1280 × 800 ou 1920 × 1080 | 120 – 180 | LVDS / MIPI | 70 cm |
| Électroménager | 2,4 pouces – 5 pouces | 320 × 240 ou 480 × 272 | 120 – 150 | MCU / SPI | 50 cm |
| Point de vente / caisse | 12,7 cm – 17,8 cm | 800 × 480 ou 1024 × 600 | 150 – 200 | RGB / LVDS | 50 cm |
| Grand écran | 15,6 pouces – 21,5 pouces | 1920×1080 | 80 – 100 | LVDS / eDP | 80 cm |
Partie 3 – Comment calculer le PPI minimum pour votre distance de visionnage
3.1 La formule Retina (version simplifiée)
Selon le concept “ Retina ” d'Apple, un écran est suffisamment net lorsque l'œil humain ne parvient pas à distinguer les pixels individuels à une distance de visionnement normale. La limite de résolution angulaire de l'œil humain est d'environ 1 minute d'arc (1/60e de degré).
De là, le PPI minimum requis pour une distance de visionnage donnée (en pouces) est :
\[
\text{PPI min.} = \frac{3438}{\text{distance de visionnage (pouces)}}
\]
Pourquoi 3438 ?
Cela découle de : 1 / tan(1 minute d'arc) ≈ 3438. Cette formule suppose une acuité visuelle de 20/20.
3.2 Exemples
| Distance de visionnage (cm) | Distance de visionnage (pouces) | PPI minimum | Exemple d'application |
|---|---|---|---|
| 30 cm | 11,8 pouces | 291 | Montre connectée, téléphone |
| 40 cm | 39,9 cm | 218 | Appareil portable |
| 60 cm | 23,6 pouces | 146 | IHM industrielles, secteur automobile |
| 80 cm | 79,9 cm | 109 | Écran d'ordinateur |
| 100 cm | 39,4 pouces | 87 | Télévision |
3.3 PPI acceptable vs PPI idéal
- Industriel / médical: Il suffit de respecter le PPI minimum. Le dépasser entraîne des coûts supplémentaires sans apporter d'avantage concret.
- Electronique grand public: Visez une valeur comprise entre 20 et 301 TP3T au-dessus du minimum pour obtenir un rendu “ haut de gamme ”.
Outil interactif
Nous mettons à votre disposition un calculateur en ligne : saisissez votre distance de visionnage (cm) → obtenez la plage de PPI recommandée et les modèles d'écrans LCD correspondants.
Partie 4 – Conseils détaillés pour le choix des applications
4.1 Appareils portables et portés (petite taille, haute densité de pixels)
Principales contraintes
- Consommation électrique (autonomie de la batterie).
- Épaisseur mécanique.
- Capacité du processeur hôte (souvent un microcontrôleur à faible consommation).
Recommandations
- Interface : MIPI DSI (basse consommation) ou SPI (très faible résolution).
- PPI : 200 – 300.
- Évitez l'interface RVB : elle épuise rapidement la batterie.
Erreur courante
Utilisation d'un écran haute résolution (par exemple, 1080p sur un écran de 4 pouces) avec un microcontrôleur d'entrée de gamme. Le microcontrôleur n'est pas en mesure de gérer le tampon d'image, ce qui entraîne un ralentissement de l'interface utilisateur.
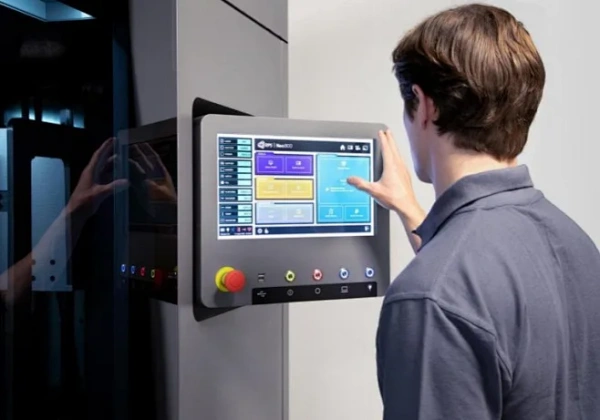
4.2 IHM industrielles (taille moyenne, densité de pixels moyenne, large plage de températures)
Principales contraintes
- Fiabilité (fonctionnement 24 h/24, 7 j/7, vibrations, poussière).
- Lisibilité en plein soleil (luminosité > 500 nits).
- Disponibilité à long terme (5 à 10 ans).
Recommandations
- Combinaisons classiques : 7 pouces (800 × 480), 10,1 pouces (1024 × 600).
- Interface : RGB ou LVDS (bonne immunité au bruit).
- PPI : 100 – 120 (suffisant pour une distance de visionnage de 60 à 100 cm).
Le piège du 1080p
Certains ingénieurs optent pour une résolution de 1920 × 1080 sur un écran de 10,1 pouces, estimant que “ plus c'est élevé, mieux c'est ”. À une distance de visionnage de 60 cm, l'œil humain ne peut distinguer les détails au-delà d'environ 150 ppp. Les pixels supplémentaires ne font qu'augmenter le coût de l'appareil, sa consommation d'énergie et les interférences électromagnétiques, sans apporter le moindre avantage visible.
4.3 Écrans pour l'automobile (grand format, haute luminosité, fiabilité exceptionnelle)
Principales contraintes
- Plage de température : de -40 °C à +85 °C.
- Résistance aux vibrations (norme MIL-STD ou ISO 16750).
- Interface LVDS (norme dans le secteur automobile).
- Longue durée de vie du rétroéclairage (> 50 000 heures).
Tendances
- On passe d'écrans de 12,3 pouces en 1920 × 720 à des écrans de 15 pouces et plus en 4K, mais cela nécessite une carte graphique puissante.
- Les écrans incurvés et la gradation locale se généralisent.
Recommandations
- Pour le système d'infodivertissement central : 8 à 10,25 pouces, 1280 × 800.
- Pour le tableau de bord numérique : 12,3 pouces, 1920 × 720 (ultra-large).
4.4 Écrans médicaux (taille moyenne, contraste élevé, conformes à la norme DICOM)
Principales contraintes
- Norme DICOM Partie 14 relative à l'échelle de gris.
- Stabilité de la luminosité (capteur de rétroaction de la rétroéclairage).
- Surface anti-éblouissante / antireflet.
Recommandations
- Taille : de 5 à 8 pouces pour les moniteurs portables ; 15 pouces et plus pour les postes de travail de diagnostic.
- Résolution : 800 × 600 (SVGA) ou 1024 × 768 (XGA).
- Technologie : IPS pour des angles de vision larges et une grande précision des couleurs.
4.5 Appareils électroménagers connectés (compacts, abordables, interface utilisateur simple)
Principales contraintes
- Coût – le présentoir ne doit pas doubler le coût de la nomenclature.
- Ressources du microcontrôleur – souvent un petit microcontrôleur ARM Cortex-M de 8 ou 32 bits.
- Affichage simple du menu ou de l'état.
Recommandations
- Taille : 6–9 cm.
- Résolution : 320 × 240 (QVGA) ou 480 × 272.
- Interface : microcontrôleur (8080) ou SPI.
Erreur courante
On utilise un écran MIPI de 480 × 800 pixels parce qu'il rend bien sur un smartphone, puis on se retrouve obligé de passer à un MPU coûteux doté d'un hôte MIPI DSI.
Partie 5 – Erreurs courantes et comment les éviter
❌ Erreur n° 1 : reproduire la résolution d'un ordinateur portable sur un petit écran
Un ordinateur portable de 15,6 pouces avec une résolution de 1920 × 1080 (141 ppp) offre une image nette. Mais un Écran 7 pouces avec une résolution de 1920 × 1080 affiche une résolution de 315 ppp. À une distance de visionnage normale, le texte apparaît extrêmement petit, la mise à l'échelle de Windows laisse à désirer et le processeur principal peine à suivre.
Corriger
Pour les écrans de 7 pouces, ne dépassez pas la résolution de 1280 × 800. Pour les écrans de 5 pouces, restez à 800 × 480 ou moins.
❌ Erreur n° 2 : ne tenir compte que de la diagonale, sans prêter attention au format
Un écran de 5 pouces au format 4:3 présente une surface active très différente (largeur d'environ 102 mm) de celle d'un écran de 5 pouces au format 16:9 (largeur d'environ 110 mm). Les mises en page de l'interface utilisateur conçues pour l'un peuvent déborder sur l'autre.
Corriger
Demandez toujours le plan technique et vérifiez la largeur et la hauteur de la zone active.
❌ Erreur n° 3 : utiliser plusieurs résolutions différentes au sein d'une même gamme de produits
Un produit utilise une résolution de 800 × 480, un autre de 1024 × 600 et un troisième de 1280 × 720. L'équipe logicielle doit gérer trois mises en page d'interface utilisateur distinctes, ce qui allonge les délais de développement et de test.
Corriger
Adoptez une résolution unique pour chaque famille de produits. Si vous devez prendre en charge différentes tailles d'écran, utilisez un contrôleur d'affichage capable de redimensionner l'interface utilisateur.
❌ Erreur n° 4 : rechercher un PPI très élevé sans tenir compte de la fiabilité
Dans les environnements industriels soumis à des vibrations, les pistes ITO extrêmement fines (nécessaires pour une résolution supérieure à 250 ppp) sont plus susceptibles de se fissurer ou de se décoller.
Explication
Un PPI élevé impose une conception avec des lignes et des espaces plus étroits, ainsi qu'un pas de soudure plus serré. Toutes les usines de modules ne sont pas en mesure de produire de manière fiable de tels panneaux destinés à des environnements difficiles.
Corriger
Pour les applications industrielles, ne dépassez pas 200 PPI, sauf si vous disposez d'un module et d'une usine certifiés.
❌ Erreur n° 5 : concevoir des zones tactiles trop petites sur un petit écran à haute résolution
Un écran de 5 pouces en 1080p (440 ppp) comporte des pixels physiques très petits, mais un bouton tactile de 50 × 50 pixels peut ne mesurer que 2,9 mm de large, ce qui est bien inférieur à la largeur minimale recommandée de 7 mm pour une utilisation tactile.
Corriger
Concevoir des cibles tactiles en fonction de dimensions physiques, et non le nombre de pixels. Au minimum 7 × 7 mm pour les doigts gantés, 5 × 5 mm pour les doigts nus.
Conclusion et prochaines étapes
Le choix de la taille et de la résolution d'un écran LCD nécessite de trouver le juste équilibre entre la distance de visionnage, la complexité de l'interface utilisateur, les capacités de l'appareil hôte, le coût et la fiabilité. Utilisez les tableaux d'aide à la décision et la formule de calcul du PPI fournis dans ce guide pour affiner vos choix.
Que faire maintenant ?
✅ Téléchargez gratuitement le tableur de sélection de la taille et de la résolution des écrans LCD – un outil Excel qui prend en compte votre distance de visionnage et le nombre de pixels par pouce (PPI) souhaité, puis vous recommande la combinaison optimale de taille et de résolution parmi notre gamme standard.
✅ Vous hésitez encore ? Indiquez-nous l'application visée (industrielle, médicale, automobile, etc.) ainsi que la distance de visionnage habituelle. Les ingénieurs de JICLCD vous proposeront trois configurations optimales dans les 48 heures, sans frais.
✅ Découvrez notre gamme de produits standard – Filtrez par taille, résolution et interface pour trouver un écran qui correspond à vos besoins.
Télécharger les spécifications du module d'affichage LCD TFT